 russej02 Reviews
I vacuum seal meat regularly for sous vide, meal prep, and freezing, and this video shows the process I use with my Avid Armor USV32 chamber vacuum sealer. For this batch I started with eight pork chops. Two went into a separate video on the complete sous vide cooking process, and I vacuum sealed the remaining six here.
The pork chops were already seasoned before I started recording. I put two chops in each bag, which gave me three packages for the fridge or freezer.
This is really a general vacuum sealing tutorial, not another pork chop recipe. The same approach works for other cuts of meat.
What I Vacuum Sealed in This Video
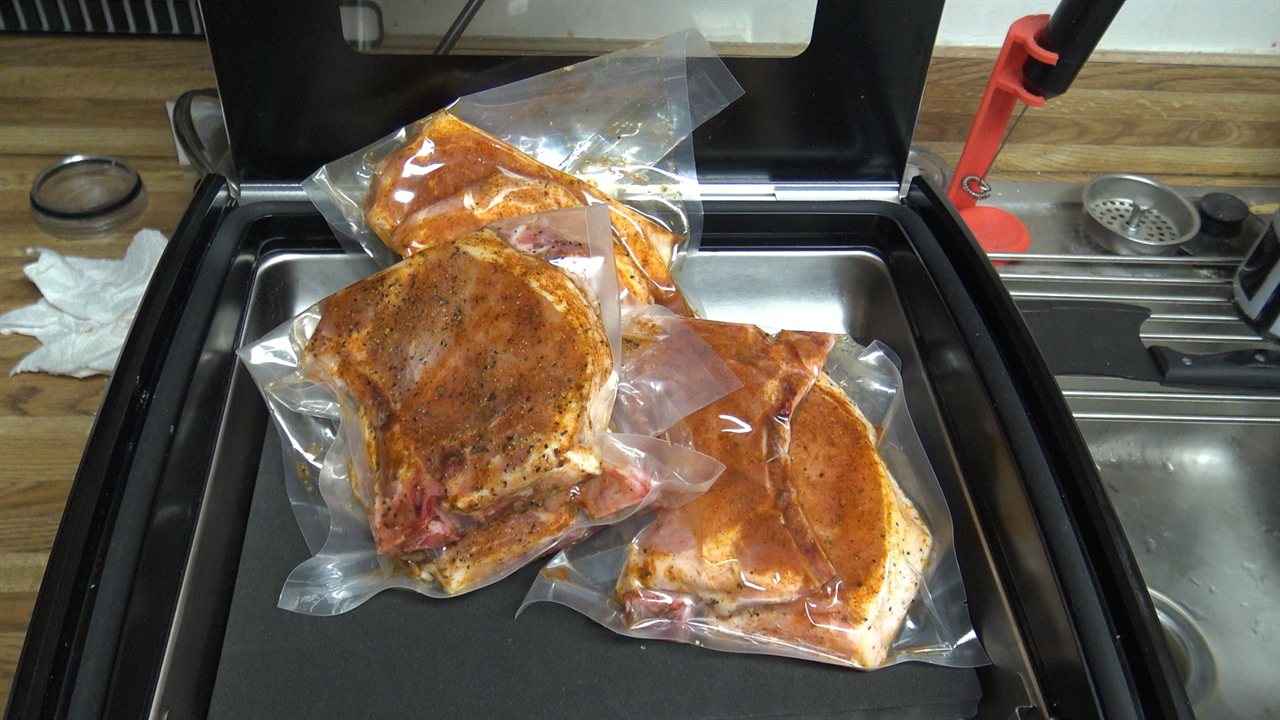
I started with the six pork chops that were not used in the sous vide video. They were already seasoned. I put two pork chops in each vacuum bag, which made three packages.
I used my Avid Armor USV32 chamber vacuum sealer for this. The photo below shows the three sealed packages sitting in the chamber.
The Bag-Folding Tip
One small habit makes chamber vacuum sealing easier: fold the open edge of the bag outward before you put the meat inside.
Folding the opening out of the way keeps seasonings, meat juices, and other residue off the part of the bag that has to seal. After the meat is in, you unfold the opening and vacuum seal the bag as usual.
It is not a revolutionary trick. It is just a simple way to keep the sealing area clean, and it is worth doing when the meat is seasoned or wet.
How to Vacuum Seal Meat
This is the process I use:
- Fold the open edge of the vacuum bag outward.
- Put the meat inside the bag. For these pork chops, I used two per bag.
- Unfold the opening so the bag is ready to seal.
- Vacuum seal the bag with the chamber vacuum sealer.
That is the whole process. The bag-folding step is the part I would keep in mind, especially if the meat is seasoned or has any liquid on it.
Why Vacuum Seal Meat?
Vacuum sealing is useful for more than one reason:
- Sous vide prep. I can season and seal meat ahead of time, then it is ready for the water bath when I want to cook it.
- Meal prep. Portioning meat into bags makes it easier to grab a package for a later meal.
- Storing cooked sous vide food. If I cook sous vide and do not eat everything, I can keep the cooked food sealed and refrigerate it for later meals.
- Freezing portions. Sealing individual portions keeps them organized in the freezer and ready to use.
Raw Meat vs. Cooked Sous Vide Food
These are two different situations, and it helps to keep them separate.
Raw meat for later cooking. You are sealing raw meat so it is ready for sous vide or another cooking method later. It still needs to be refrigerated or frozen like any other raw meat.
Cooked sous vide food. If you are storing food that has already been cooked, it still needs to be refrigerated for later. Vacuum sealing does not make cooked food shelf-stable.
Vacuum sealing removes air, but it is a packaging step, not a substitute for refrigeration or freezing. Keep raw meat and cooked food at safe refrigerator or freezer temperatures, and follow normal food-safety guidance for storing and reheating. The USDA's general guidance is 40°F or below for the refrigerator and 0°F or below for the freezer.
The Equipment I Used
These are the two products I used:
Avid Armor USV32 Chamber Vacuum Sealer
Final Thoughts
Vacuum sealing is one of those prep steps that saves time later. For this batch, six seasoned pork chops went into three bags, and the bag-folding habit kept the sealing area clean.
If you want to see the complete sous vide cooking process for pork chops, I have a post on sous vide pork chops at 140°F for 2 hours, including the cast iron sear.
If you are sealing liquids or marinades rather than meat, I also have a post on vacuum sealing food with liquid. And if you want a closer look at the sealer itself, I have a review of the Avid Armor USV32.